Friday, May 28, 2010
veggie junkie!
My goodness! There are just the two of us, and we finish 6 large hearts of romaine lettuce in 4 days, not to mention other vegetables like cucumbers and carrots! They just get snacked away during the evenings.
Friday, May 21, 2010
Veggie pies
I love veggie pies. They make such great meals. Here are my two recent experiments. One thing that I've always wanted to try out is to use herbed oil to roast vegetables. So I try this out on my latest vegetable pies.

Recipe 1: Zucchini pie (make 1 9" by 1/2" thick pie)
Ingredients:
- 1 small yellow squash
- 1/2 large zucchini
- 2 eggs
- 2 TB cottage cheese
- 2-3 TB flour
- 2-4 TB water
- 1/4 tp salt
- 1/4 tp of celery seeds
- 1/4 tp dill weeds and lemon peel flakes
- handful of shredded mozzarella and asiago cheeses
- 1/4 tp dried rosemary
- 2-3 TB olive oil
Procedure:
1. Slice the yellow squash and the zucchini thinly. Safe some for topping. Cook the remaining in a non-stick pan heated with oil. When the squashes are soft, add celery seeds, dill weeds and lemon peel flakes. Then allow to cool.
2. Beat egg lightly. Add cottage cheese and mix well. When the cooked squashes are cool, add in the egg and cheese and mix. Then sprinkle flour and mix well. Pour the mixture into a pan greased with butter.
3. Sprinkle shredded cheeses on top. Place thin slices of yellow squash and zucchini on top.
4. Sprinkle rosemary on top. Brush the squash toppings generously with olive oil.
5. Bake at 350F for about 20-30 minutes.
6. Allow to cool before serving.


Recipe 2: Eggplant tomato pie (1 small 6" pie)
Ingredients:
- 1 medium eggplant, sliced
- 1/4 cup fresh or canned diced tomato
- 2 TB cottage cheese
- 1 egg
- 1 tp oregano flakes and some more for topping
Procedure:
1. Save some slices of eggplant as topping. Mix the remaining with tomato cheese, egg and oregano flakes.
2. Pour the mixture into a baking pan. Top with eggplant slices.
3. Apply olive oil generously. Then sprinkle oregano flakes.
4. Bake at 350F for about 20-30 minutes until the pie consolidate.
5. Serve when cooled.

In the making of these two pies, the most exciting part is when the herbs release their aromas during the baking. That aroma, blended with the vegetable toppings, makes the pie very tempting.
Thursday, May 20, 2010
Homemade minced beef
I recently acquired an excellent toy from a thrift store. It's a second-hand powerful meat grinder. It costed me only $8, but brought unlimited joy to our home. By and by, I'm learning how to handle this brute.
Fresh lean beef, trimmed of all fat, and dry (this is in the best condition for mincing):

Meat grinder:

Resultant lean beef:

- Like any motor-driven devices, it probably will last long when it runs in pulses instead of grinding non-stop.
- In addition, the meat grinder seems to do well with lean meat, but easily gets jammed with meat that has mixed tendons and fat. Well, that's a good thing, since I bought it primarily to make lean ground meat.
- The grinder works best when the meat is rather dry, not watery.
- Cutting the meat into 1" pieces helps increase the efficiency and prevent jamming.
Fresh lean beef, trimmed of all fat, and dry (this is in the best condition for mincing):

Meat grinder:

Resultant lean beef:

Wednesday, May 19, 2010
Navy beans salty anchovies patty
I like anchovies. And I like beans. Curiosity leads me to imagine putting them together. Here comes my experiment on a bean patty with a strong anchovy flavor.
Recipe: Navy beans salty anchovies patty (1 patty)
Ingredients:
- 4 salted anchovies in 1/2 teaspoon (tp) olive oil
- 1/3 cup very well cooked navy beans, drained
- 1/4 cup glutinous rice flour
- dash of italian herbs seasonings
Procedure:
1. Mush the salted anchovies into small flakes.
2. Add in the navy beans and mush them together into a paste. Add herbs.
3. Then add glutinous rice flour and stir to thicken until the paste can stand rather firmly on its own. The flour gives the baked patty a smooth texture and provides some stickiness to hold it together.
4. Bake in a small loaf pan at 325F for about 30-40 minutes or until the top is wrinkled.
5. Then allow to cool so that the crust hardens.
When cooled, the patty has a crust that is almost like hush brown. It seems that all bean patties have the same behavior. They are soft when baked in the oven. Then they harden when they cool.

Tuesday, May 18, 2010
non-vegetarian red bean patties (a failed attempt)
Being very curious about beans, I decided to try out a bean patty to see how far the beans can go. Almost all recipes I saw used starch as a glue because they the patties are fake hamburgers. I'm no vegetarian. I'd rather have meat than starch as a glue. So I tried out the following experiment, in which the beef is primarily for the flavor and for holding the bean together.
Recipe: non-vegetarian red bean patties
Ingredients:
- 1 cup dried small red beans, soaked for 3 days
- 4 cup meat stock
- 1 tablespoon (TB) onion powder
- 1 teaspoon (tp) garlic, finely chopped
- 1 tp basil flakes
- 1/4 tp salt
- 1/4 tp cumin powder
- 6 oz minced beef 85% lean
- 1 tablespoon (TB) chipotle oil
- 1 TB worcestershire sauce
Procedure:
1. Cook soaked red beans in a pot with meat stock on medium to med-high heat for at least 2 hours until beans break. Keep the beans immersed in liquid at all times. When beans break, add onion powder, garlic, basil, salt and cumin powder to mixture. Cook until liquid almost dries out. Stir very frequently to prevent sticking. Once the liquid is almost dried, turn heat off. Use a potato musher to mush the beans into a coarse mixture.
2. After the mixture cools down, use hands to work on the coarse mixture, both to knead and to squash any whole beans. At this point, the mixture is somewhat chunky and it does not quite hold together. Add ground beef, worcestershire sauce and chiptotle oil. Mix well, and use hands to knead the mixture vigorously. The more the kneading, the more the mixture develops a gluey feel. Knead about 30 minutes.
3. Partition dough into small pieces that can be handled by the palms. Roll each piece firmly between two palms for a minute or so to develop stickiness. Make into desired type of shape , such as a flat patty or a flower. Patty-shaped pieces can be pan-fried while other shapes need to be baked.
4. For pan-frying, spray a flat non-stick pan with Pam (or use 2 TB oil). Place patties on pan and cook each side until the bottom detaches from pan. Flip to cook the other side. Takes about 5 minutes per side. For baking, place pieces on a baking pan coated with oil. Bake covered by aluminum foil at 350F for 30 minutes or until there comes the aroma of beef.

The patties have a hint of beefy taste without the fat. By themselves they are a bit dry. But they go very well with ketchup and yellow mustard! They also do very well with some tomato and cheese toppings.

Monday, May 17, 2010
double-boiled egg and milk
When I was growing up, my parents frequently made an egg dish for me. It's simply egg, evaporated milk and sugar, beaten together, and steamed until it forms a custard. My parents have done it so many times that they are able to make it very tender, without too many bubbles. One morning, I thought of this childhood favorite, and decided to make it for my own breakfast.

Recipe: Double-boiled egg and milk (for 1)
Ingredients:
- 1 large egg
- 1/3 cup evaporated whole milk
- 1 strawberry
- 1/4 tp honey
Procedure:
1. Beat egg and evaporated milk in a souffle dish until the two are well blended. The liquid should come up to about 3/5 or 2/3 the height of the souffle dish.
2. Boil a pot of water, with a steaming stand in it. The water level should almost reach the level of the egg mixture when the souffle dish is placed on the stand. Bring the water to a boil.
3. Place the souffle dish in the pot, about half submerged in the boiling water. Be careful to remove any bubbles trapped under the souffle dish. Turn heat down to medium.
4. Allow the water to simmer in the pot for 5-10 minutes. Do not bring to a boil in case the water may spill over into the souffle dish.
5. If it is desired to cover the pot with a lid, then place a lid on the souffle dish before doing so. This prevents condensed water vapors from falling onto the egg and marring the top.
6. The surface of the egg mixture will slowly solidify. Shake the dish gently to detect the thickness at the center of the dish.
7. When the egg at the outer half of the radius of the dish has solidified, turn heat off and cover lid. Allow the warmth to slowly diffuse to the center of the dish. Done when the center has hardened.
8. Serve with a strawberry and a drop of honey.
Just started double-boiling:


Interior of the egg:

Large bubbles may come from the stirring. Does the edge look overcooked?


Recipe: Double-boiled egg and milk (for 1)
Ingredients:
- 1 large egg
- 1/3 cup evaporated whole milk
- 1 strawberry
- 1/4 tp honey
Procedure:
1. Beat egg and evaporated milk in a souffle dish until the two are well blended. The liquid should come up to about 3/5 or 2/3 the height of the souffle dish.
2. Boil a pot of water, with a steaming stand in it. The water level should almost reach the level of the egg mixture when the souffle dish is placed on the stand. Bring the water to a boil.
3. Place the souffle dish in the pot, about half submerged in the boiling water. Be careful to remove any bubbles trapped under the souffle dish. Turn heat down to medium.
4. Allow the water to simmer in the pot for 5-10 minutes. Do not bring to a boil in case the water may spill over into the souffle dish.
5. If it is desired to cover the pot with a lid, then place a lid on the souffle dish before doing so. This prevents condensed water vapors from falling onto the egg and marring the top.
6. The surface of the egg mixture will slowly solidify. Shake the dish gently to detect the thickness at the center of the dish.
7. When the egg at the outer half of the radius of the dish has solidified, turn heat off and cover lid. Allow the warmth to slowly diffuse to the center of the dish. Done when the center has hardened.
8. Serve with a strawberry and a drop of honey.
Just started double-boiling:

Edge of the egg started to solidify:

Egg half-done, turn heat off and allow to cook slowly in the warmth of the water bath:

Egg done:

Interior of the egg:

Large bubbles may come from the stirring. Does the edge look overcooked?

Sunday, May 16, 2010
Curry chicken and eggplant with milk
In this experiment, I am learning how to handle chicken breasts. They tend to become rubbery and tough when over-cooked, and the problem is that they overcook too readily. So my attempt is to shorten its cooking time. I also discover that evaporated whole milk can completely change the flavor of a curry dish, making it a lot milder and smoother.
Recipe: curry chicken and eggplant with milk
Ingredients:
- 1 medium Chinese eggplant, cut to 2" pieces
- 3-4 oz chicken breast marinated and fried in home-made dijon mustard, cut to 2" pieces
- 1 TB onion powder
- 2 tp tomato paste
- 1/4 tp turmeric powder
- 1/4 tp paprika
- dash of cumin
- garlic powder
- 1/4 tp salt
- 2 TB evaporated whole milk
- 2 TB oil
- 1/4 to 1/2 cup chicken stock
- 1 stalk spring onion
Procedure:
1. Heat oil in a sauce pan. Add Chinese eggplant and all the spices and dry seasonings. Allow to brown gently. Then add chicken stock and tomato paste. Mix well. Bring to a boil for a minute. Then let simmer for 5 minutes. Then turn heat off and allow to sit on stove top, so that the eggplant will not cook until disintegrate.
2. 15 minutes before serving, add chicken breast pieces. Bring the pot to a low boil. Then turn heat down to low. Slowly stir in evaporated whole milk.
3. Serve hot, topped with spring onions.

I have yet to tune the flavor of this dish. But one thing sure is that my husband likes tomato in a paste form much more than whole tomatoes.
Saturday, May 15, 2010
Roasted tomatoes with shrimp and cheese toppings
Here is an experiment that turned out not bad. Not my husband's favorite, but a good experiment on roasting tomatoes and baking shrimps. I'd say that cottage cheese may not be the best choice for this dish. Maybe mozzarella or mayonnaise would give better result.
Recipe: Roasted tomatoes with shrimp and cheese toppings
Ingredients:
- 3 ripe tomatoes on the vine
- 3 cloves of garlic, cut into small pieces
- 6 medium raw shrimps, shelled and de-veined
- 3 tp fat-free cottage cheese
- 1 slice low-fat cheddar cheese, cut to strips
- parsley flakes
- 2 TB olive oil
Procedure:
1. Halve the tomatoes. Slip small pieces of garlic into each of the halves.
2. Oil a baking pan covered with foil. Oil the skin of each tomato half. Then place the tomatoes, cut-side down on the pan. Bake at 300F for 1.5 hours.
3. When done roasting, use a spatula to flip each tomato. On top of each half, spread 1/2 tp cottage cheese, place a shrimp, then top with a few strips of cheddar cheese. Return to oven and bake at 350F for 15-30 minutes, until shrimps are pink.
4. Sprinkle parsley flakes on top. Serve hot.

Friday, May 14, 2010
Almonds in saffron
This is originally a stuffing for a chicken dish that I learnt from my Persian friend. But it tastes so good, I'm beginning to cook it as a side dish to a meat, and even as a main dish by itself.

Recipe: Almond in saffron (make 1 side dish)
Ingredients:
- 1/3 cup raw almonds, soaked overnight to thoroughly soften
- 1/2 small onion, very thinly sliced
- 1/4 teaspoon (tp) Persian saffron, dissolved in 2 tablespoons (TB) boiling water
- 1 clove garlic, finely chopped
- 1 TB barberries, soaked
- 1 tp dried longan
- 2-3 pieces of water chestnuts from a can, finely chopped
- 1 TB red pepper, coarsely chopped
- 1/4 tp kosher salt
- dash of paprika (optional)
- 1-2 TB oil
Procedure:
1. Thinly slice the soaked almonds. Remove skins while slicing.
2. Place almond skins in a small baking pan and place in toaster oven at 150-200F for 10-15 minutes until skins are crispy. Crumble them finely into flakes.
3. Heat oil in non-stick pan until warm. Add garlic and onion to pan and let sizzle. Then add almonds and salt. Allow to cook on medium heat for a few minutes, stirring occasionally, until the aroma is diffused out.
4. Add barberries, longan, water chestnuts, and half of the dried almond skins. Add in the saffron water (and optionally paprika). Allow the mixture to cook on medium heat for 5-10 minutes, stirring occasionally. Then turn heat off and let sit on stove for 30 minutes. Reheat just before serving. Add red pepper after thoroughly warmed.


Thursday, May 13, 2010
Refining yogurt chicken fillet
With time, my yogurt chicken fillet keeps getting better. Now I am learning to make a sauce out of the browned yogurt when pan frying chicken fillet. Yogurt tends to get cooked and burnt easily. So it needs to be watched very carefully while cooking. It seems to be at its best when it's cooked to a deep brown but not burnt yet. The color looks like paprika, and has a fine taste that is nothing like diary.
Recipe: Yogurt chicken fillet with yogurt sauce
Ingredients:
- 1 boneless skinless chicken breast, sliced to fillets
- 1/3 cup homemade yogurt, using milk with 1% milk-fat
- 1 tp garlic powder
- dash of lemon dill flakes
- dash of turmeric (optional)
- green part of spring onion, finely chopped
- 1-2 TB oil
Procedure:
1. Stir the yogurt to form a smooth paste. Marinate chicken breast fillets in yogurt overnight in the fridge.
2. 20 minutes before cooking, take chicken out of the fridge to warm up.
3. Heat oil in a flat non-stick frying pan on high heat. Place chicken fillets with all of the yogurt marinate on the oiled pan and allow to sizzle. Sprinkle garlic powder and lemon dill flakes on top while cooking. Plenty of water will come out from the chicken. Turn heat down to med-high or medium. When the chicken is half-cooked, move each piece gently to prevent sticking. Scrub off any bits of yogurt that is sticking on the pan. Allow to continue cooking until almost cooked. Flip each piece to cook the other side. The cooked side to be golden brown. If not browned enough, flip the side down to brown a bit more. Do not allow the pan to dry out completely and burn the yogurt.
4. Mix about 1/4 cup of yogurt with garlic powder and turmeric. When the liquid on the pan's bottom is almost dry out, add in the yogurt mixture and turn heat down to med-low. Mix with the browned liquid in the pan. Cook until the yogurt forms a sauce.
5. Serve when the sauce is ready. Top with greens of spring onion.

Oh very very yummy!
Wednesday, May 12, 2010
Green beans walnut breakfast
Morning is the time that the palate is most sensitive to flavors. Recently I tried out different variations on breakfast. They are simple and very enjoyable.
Recipe: Green beans and walnut breakfast
Ingredients
- 1.5 cup green beans, chopped into small cubes
- 1 tp butter
- 1/8 cup walnuts, crushed
Procedure
Blanch chopped green beans in boiling water for 1 minute. Drain. Add in walnuts. Mix. Add butter.

Simple and fresh.
Recipe: Green beans and walnut breakfast
Ingredients
- 1.5 cup green beans, chopped into small cubes
- 1 tp butter
- 1/8 cup walnuts, crushed
Procedure
Blanch chopped green beans in boiling water for 1 minute. Drain. Add in walnuts. Mix. Add butter.

Simple and fresh.
Tuesday, May 11, 2010
Phili cheese steak
During the very cold winter we just had, my husband and I had to take turn to shovel snow. We worked on a 2-hour shift. When he was out there, I would be home to bake and cook, so that when he came home, the first thing that greeted him would be the warmth of food. It was on one of those snow days that I thought of trying out the Phili cheese steak sandwich, which should give ample calories for a work day like that. My first experiment was pretty good.
Recipe: Phili cheese steak sandwich
Ingredients:
- 2 whole wheat hot dog buns
- 8 oz lean beef, very thinly sliced (available in some Korean markets)
- 1 TB worcestershire sauce
- 1 TB catchup
- dash of pepper
- 1/2 small red onion, very thinly sliced
- 2 slices of cheddar cheese
- 1 TB oil (optional)
Procedure:
1. Cook beef in a non-stick pan (optionally with oil) on high heat, until the beef gives out ample water. Add in the red onion. Add worcestershire sauce and pepper. Allow to cook until the onions are soft. Add catchup and mix well. Allow the liquid to almost dry off from the mixture.
2. Push the mixture to one side of the pan. Open the hot dog buns and place the inner sides on the hot surface of the non-stick pan. Allow the surface to be toasted by the heat. Remove the beef mixture if its liquid is making the buns too wet (and replace them back when the buns are done toasting).
3. When the buns are toasted, place a slice of cheese on half the beef mixture and allow the cheese to melt on top of the beef. Once the cheese is melting, place a bun on it, and using a spatula, flip the beef into the bun.

A perfect winter lunch!
Monday, May 10, 2010
lasagna with herbs
At home, lasagna is such a great favorite that every time I make it, it's going to make a feast. My husband likes every version I make, and wants me to keep a record of the varieties.

Recipe: Lasagna
Ingredients:
- 6-9 pieces of lasagna noodles
- 1/2 cup fat-free cottage cheese
- about 3 oz of skim-milk mozzarella cheese, sliced very thinly
- 1 TB shredded asiago cheese
- 12 oz very lean ground beef
- 3/4 cup red wine
- 1/4 cup tender celery stalk with leaves, finely chopped
- 1/4 cup red pepper, finely chopped
- 1 medium ripe tomato, sliced
- 3/4 can unsalted diced tomatoes, with juice
- 2 TB unsalted tomato paste
- 2 cloves garlic, finely chopped
- 1 tp oregano flakes
- 2 TB mix of italian herbs (basil, marjoram, rosemary, thyme) in flakes
- 2 bay leaves
- 1 tp salt
- 1/2 tp sugar
- dash of parsley (garnish)
Procedure:
1. Cook lean beef with garlic powder until the meat has changed color.
2. Add all the herbs, sugar, salt and red wine. Allow to mix and cook for a minute. Then add all the vegetables. Add in the canned tomatoes. Bring to a boil and allow to simmer for 20-30 minutes.
3. When the beef mixture is almost done, add in the tomato paste and mix well. Turn heat off.
4. In a large pot, boil water to cook the lasagna noodles until soft.
5. In a baking pan, cover the bottom with a layer of beef mixture. Mix in 2 TB of cottage cheese and some fresh tomato pieces. Then add a layer of lasagna noodle. Sprinkle a little mozzarella cheese and asiago cheese on top of the noodles. Repeat the layering until in total there are 3 layers of noodles interlaced with 3 layers of beef, tomatoes and cheese. Try to use up all the cottage cheese while making the 3 layers of beef and cheese. Add any remaining beef mixture or tomatoes on top. Cover with any remaining mozzarella or asiago cheeses.
6. Cover with foil. Bake at 375F for 20-30 minutes. Sprinkle parsley flakes on top and serve hot.


- In this experiment, I keep the lasagna moist by cooking the noodles not just until they are soft, but actually until they have absorbed the water and expanded. If the noodles are cooked to just soft, 2+2/3 pieces of noodle would be enough to cover one layer. But when they have fully absorbed water, 2 pieces are more than enough to make one layer. This way, they won't absorb moisture from the lasagna when baked.
- I also cook the lasagna for just 30 minutes and serve it right away. If I leave it in the oven for a long time, the lasagna becomes drier, and hold the layers better.
- I do not know if it's because I use fat-free cheeses or because I make my own spaghetti sauce, the fillings in the lasagna tend to be somewhat lumpy without holding much water, instead of forming a thick paste.
Sunday, May 9, 2010
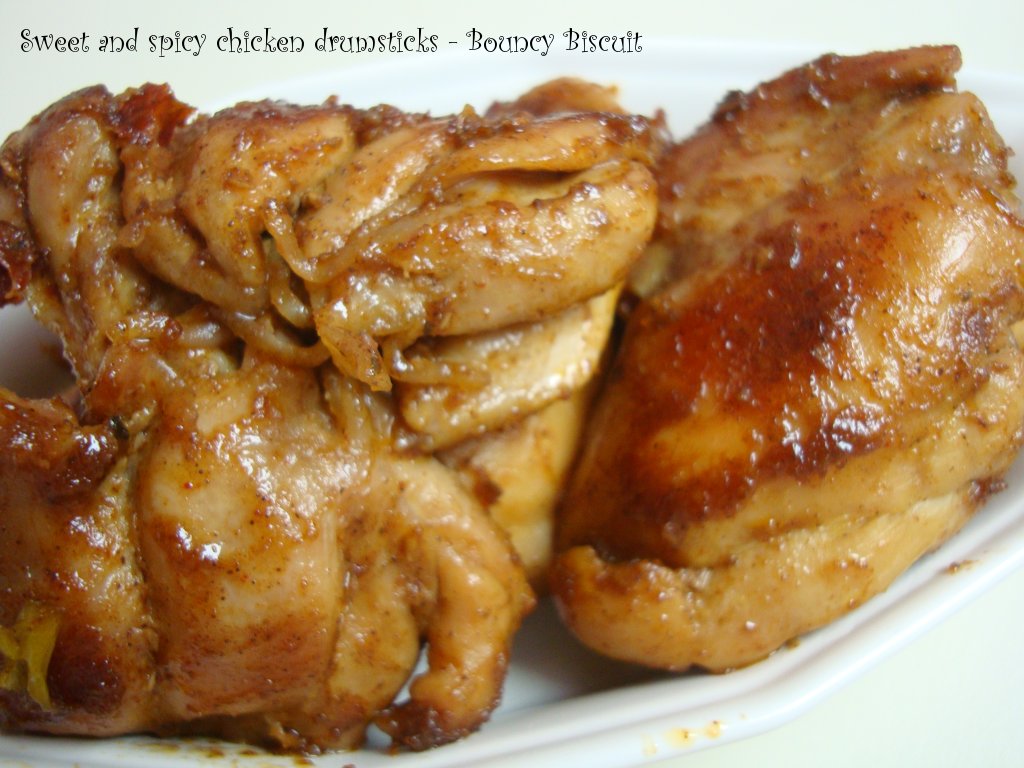
Sweet and spicy boneless chicken thighs
It's fun to play to spices and seasonings. Drumsticks and thighs are one of the dishes that allow plenty of room for such experiments. Here is a version of my chicken thighs that has the basic sweet and spicy flavor, but with a twist in its colors and spices.

Recipe: Sweet and spicy boneless chicken thighs (6 pieces)
Ingredients:
- 6 boneless skinless chicken thighs, trimmed of fat
- 1.5 TB white sugar
- 1 tp kosher salt
- 2 tp garlic powder
- 2 tp star anise
- 2 bits of cloves
- 1/2 tp cinnamon powder
- 1/4 tp cumin powder
- 1 TB paprika powder (for color)
- 1/4 tp hot pepper flakes
- 1/3 cup water or beef stock
- 1 stalk of white part of spring onion (optional)
Procedure:
1. Place the chicken thighs on the bottom of a non-stick pan. Sprinkle all the seasonings on top. Allow the thighs to cook on med-high to high heat on stove top. No oil is needed because the thighs have a little fat within.
2. When the chicken meats give out water, turn them and allow the seasonings to mix with the liquid. Let the surfaces of the thighs brown a little in the seasoning.
3. Once the chicken meats look cooked on the surface, turn heat down to medium. Adjust the liquid level in the pan by adding about 1/3 cup of water or beef stock. Keep the liquid level to about 1/6 the height of the meat.
4. Cover the lid and allow the meats to cook in the steam from boiling the liquid on medium heat. It takes
about 20 minutes for the liquid to gradually thicken.
5. Once the liquid has thickened, turn the chicken thighs to coat all sides with the thickened gravy. Add spring onion white, if desired. Allow the gravy to caramelize on the surface of the thighs. But be very careful not to burn the gravy.
6. Cool before serving.

Saturday, May 8, 2010
almond meal pancake breakfast
I was curious with almond meal and so purchased a pack of it for making cookies. After that, I am left with so much of it that it becomes a challenge to find a way to consume it. Today I tried to make an almond pancake for breakfast.
Recipe: almond pancake
Ingredients:
- 1 egg
- 3 TB almond meal
- dash of salt
- dash of cinnamon
- cooking spray
Procedure:
Beat egg with almond meal to form a batter. Add salt to taste. Spray a pan with cooking oil and heat on med-high setting. When the pan is hot, pour the batter into the pan. Turn heat down to medium and allow to cook until the fine bubbles on top have almost solidify. Flip the pancake once to cook the other side for just a little while. Sprinkle cinnamon on top and serve.

The almond flavor is not that strong in this pancake, but the savory taste of it is excellent. It's quite an interesting twist.
Friday, May 7, 2010
Homemade honey dijon mustard
I bought some whole mustard seeds by accident. So it's my new mission to find out how to use it. Here comes my findings on dijon honey mustard from the southernfood.about.com web.

Recipe: Dijon honey mustard with honey (make 1 small jar)
Ingredients;
- 2 oz mustard seeds, ground to powder
- 1 cup white wine
- 1 small onion, very finely chopped
- 1 clove of garlic, very finely chopped
- 1 TB honey
- 1 TB olive oil
- 1 tp kosher salt
- 1 drop of Picamas hot sauce
Procedure:
1. Mix honey, onion and garlic in white wine and bring to a boil. Then allow to simmer for 10-15 minutes.
2. Strain the liquid into the mustard powder, and mix until it forms a smooth paste. Add in oil, salt and hot sauce. Allow to cool and refrigerate for a few days before use.

Thursday, May 6, 2010
Apple pork chop
I've done this some time ago. I really miss it. So I'm doing it again, this time without ham stock. What I didn't expect is that with just half a large apple and one carrot, the gravy of this dish becomes very sweet! The salt and the chicken stock gives it a rich savory taste. So this dish is very flavorful.
Recipe: Apple pork chop (for 2-3)
Ingredients:
- 2 lean pork chops
- half a large apple, with skin, cut to 1/2" cubes
- 1 carrot, cut to 1/2" cubes
- 1 stalk of celery stem, cut to 1/2" cubes
- 1/4 teaspoon (tp) kosher salt
- 1 tp marjoram flakes
- 2 tablespoons (TB) cream of chicken
- 1/2 cup chicken stock
Procedure:
Heat pork chops in chicken stock until boiling. Add in the salt, herbs, apple, carrot and celery. Allow to boil for 1-2 minutes. Add the cream of chicken. Mix well. Then allow to simmer for 20 minutes. Place the pork chops and solid ingredients on serving dish. Thicken the gravy by boiling on high heat until about 1/4 cup of gravy remains. Pour gravy on top of the pork chop and serve.

Wednesday, May 5, 2010
kappa cabbage stir-fry
I usually cook kappa cabbage in a soup or a stew because of how fast the leaves wilt and give off a pool of water. Lately, I am more interested in eating it crispy. The trick is to cook it for a really short time. In total, this dish takes only 5 minutes of cooking. But the vegetables need to be shredded to about 1/8" to 1/4" thick in order for the vegetables to be cooked rapidly without melting away. The onion, carrot and squash are cooked first because they can endure longer heat. I choose this combination of vegetables because they offer a diversity of tastes and flavors when mixed. No salt other seasoning is added. The ham alone contributes to the saltiness of the dish.
Recipe: Kappa cabbage stir-fry with ham and mixed vegetables (for 4)
Ingredients:
- 4 cups of shredded kappa cabbage, the white and the green parts separated
- 1 medium carrot, shredded
- 4-6 oz ham, cut to thin strips
- 1/2 onion, shredded
- 1/2 stalk of celery with leaves, chopped
- festival squash, peeled and shredded
- 1 TB oil
Procedure:
Heat oil in a large frying pan on high heat. Add shredded onion, carrot and squash into the pan and fry until lightly golden. Add the white part of the shredded kappa cabbage. Stir to mix. When the white cabbage stems freshen up, add the green parts of the cabbage. Mix. Then add the ham and allow to cook for 30 seconds in the liquid that comes out of the vegetables. Serve right away.

Tuesday, May 4, 2010
Seafood rolls
Some days, I have an abundance of both spirit and leftovers. So my afternoons are spent revering how to combine the ingredients to make something interesting. Here is one appetizer that tastes outstanding because of the unique blend of textures and flavors---the sweetness of sweet potato, the sourness of lime juice, the chewy fish cake, the strong salty taste of sausage, and the shrimp.

Recipe: Seafood rolls (make 4)
Ingredients:
- 1 thin sheet of fried fish cake, about palm sized and 1/8" thick
- 1 low-fat hot dog sausage
- 1/4 cup mashed sweet potato (about 1/3 a small sweet potato)
- 3 TB finely mashed chickpea, well mixed with lime juice
- 4 medium frozen raw shrimps, defrosted
- 1 TB spring onion green
- sesame oil
Procedure:
1. Lie the fish cake sheet flat on a work surface. Spread the mashed sweet potato thinly and uniformly over the sheet. Then place the sausage at one end of the sheet and roll up the sheet around the sausage to make a roll. Then cut the roll into 4 pieces. The sweet potato will not be strong enough to hold the rolls together at this point. But once the rolls are baked, they will keep their shapes.
2. Place the small rolls in a mini-muffin pan. Bake at 300F in a toaster oven until the sausage has shrunk and the fish cake sheet has shrunk to its shape.
3. Spread on each roll about 1/2 TB of mashed chickpea with lime juice.
4. Top with a raw shrimp. Bake again until the shrimps are cooked. The juice of the shrimps will be absorbed by the chickpea paste.
5. Add small bits of spring onion green at the center of each shrimp. Brush the top and side of each roll lightly with sesame oil. Bake again for a few minutes until the sesame oil is hot. Serve right away.
Hot dog rolled in a sheet of fish cake:
 Baked rolls:


Recipe: Seafood rolls (make 4)
Ingredients:
- 1 thin sheet of fried fish cake, about palm sized and 1/8" thick
- 1 low-fat hot dog sausage
- 1/4 cup mashed sweet potato (about 1/3 a small sweet potato)
- 3 TB finely mashed chickpea, well mixed with lime juice
- 4 medium frozen raw shrimps, defrosted
- 1 TB spring onion green
- sesame oil
Procedure:
1. Lie the fish cake sheet flat on a work surface. Spread the mashed sweet potato thinly and uniformly over the sheet. Then place the sausage at one end of the sheet and roll up the sheet around the sausage to make a roll. Then cut the roll into 4 pieces. The sweet potato will not be strong enough to hold the rolls together at this point. But once the rolls are baked, they will keep their shapes.
2. Place the small rolls in a mini-muffin pan. Bake at 300F in a toaster oven until the sausage has shrunk and the fish cake sheet has shrunk to its shape.
3. Spread on each roll about 1/2 TB of mashed chickpea with lime juice.
4. Top with a raw shrimp. Bake again until the shrimps are cooked. The juice of the shrimps will be absorbed by the chickpea paste.
5. Add small bits of spring onion green at the center of each shrimp. Brush the top and side of each roll lightly with sesame oil. Bake again for a few minutes until the sesame oil is hot. Serve right away.
Hot dog rolled in a sheet of fish cake:


Beef khoresh with eggplant and tomatillo
I miss khoresh! It's been a while since we had it. So I made a deliberate trip to the market to get some vegetables today to make a beef khoresh. What I found are Chinese eggplant and tomatillo. Tomatillo looks like green tomato, but it's actually not a variety of tomatoes. It tastes in between tomatoes and gooseberries. I've learnt to use yogurt to tenderize meat. It's been very successful with chicken white meat. So I tried it out on the very lean cut of beef too. According to my husband, who is my food critic, the beef tastes really good, though the yogurt flavor is not distinctive. In fact, it's likely to have been completely covered up by the spices. Since the yogurt is merely for tenderizing, it's not important whether its taste comes out in the dish. The eggplant and the tomatillo matter more because their presence directly contribute to the complex flavor of the dish.

Recipe: Beef khoresh with Chinese eggplant and tomatillo (for 3)
Ingredients:
- 8 oz lean beef cut
- 2-4 tp plain yogurt (flavored ones will do too)
- 1 medium tomatillo, cut to 8 slices
- 2 small Chinese eggplants, coarsely cut to irregular shapes
- 1 teaspoon (tp) sugar
- 1/2 tp salt
- 1-2 tp turmeric powder
- 1/4 tp strong chili powder
- 1 tp paprika
- 1/2 tp garlic powder
- dash of cumin powder
- 1 tablespoon (TB) oil
- 2-4 TB water or meat stock
Procedure:
1. Cut beef into 1" cubes. Place in a bowl and mix with yogurt. Make sure that all sides of the beef is coated with a bit of yogurt. Cover with plastic wrap. Allow to chill overnight. Take out of the fridge to warm to room temperature about 2 hours before cooking.
2. Broil chopped eggplants in oven at 450F until the eggplants give out a sweet aroma. Set aside.
3. Heat 1 TB oil in a non-stick pan on high heat. Add the beef to the pan and allow all sides to brown lightly. Then add turmeric, chili, garlic, cumin, sugar and salt. Mix the seasonings with the juice from cooking the beef. Cooking for a few minutes until the aroma of the spices is strong. Then add the eggplants. Mix well.
4. Transfer the mixture to a sauce pan. Add a little water or meat stock to cover up to 1/2" of the bottom of the pan. Allow to cook on low heat for about 30 minutes. Do not stir, else the eggplants may disintegrate. About 15 minutes before serving time, add the paprika and tomatillo. Stir gently to make sure the paprika dissolves into the gravy, and the tomatillo is soaked. Continue cooking on low heat until serving time.
5. Serve with steamed rice.

This is such a very very tasty dish, one of our favorites!!
Monday, May 3, 2010
Stuffing Chinese eggplants
Recently, the availability of a meat grinder has opened up many new doors to ground meat dishes. Here is one with my very lean pork meat. I use a large piece of pork shoulder, but trim off all the fat before grinding. The meat is not all together lean because of the cut. But it's reasonably good. When pork is without much fat, something else is needed to provide the stickiness needed for making meatballs and stuffings. I like to use a variation of cornstarch, tapioca and glutinous rice flour. They provide various form of stickiness. I particularly like to use the glutinous rice flour for meatballs. This time, I am also using it for the stuffed eggplants.

Recipe: Stuffed Chinese eggplants
Ingredients:
- 2 medium Chinese eggplants
- 4 oz ground pork (lean)
- 1/2 tp garlic powder
- 1/4 tp salt
- 1/2 tp sugar
- dash of chili powder
- 2 tp marjoram flakes
- 3 TB buttermilk
- 2 TB glutinous rice flour
- 1 tp oil
- 1 cube furu
Procedure:
1. Cut eggplants lengthwise into halves. Cut out a long cavity in each half.
2. Mix the pork, garlic powder, salt, sugar, chili powder marjoram flakes and buttermilk. Stir well in one direction. When it has become sticky, add the glutinous rice flour. Continue to stir for 1-2 minutes. Then add oil and allow to rest for 5 minutes.
3. Stuff each half of the eggplants with filling. Place in a baking pan coated with oil. Cover pan loosely with foil. Bake in middle rack at 350F until cooked (about 20-30 minutes).
4. Then remove foil. Turn oven to broil at 425F. Place pan on top rack closest to the heating element. Broil for 5 minutes or until top is golden.
5. Beat 1 cube of furu into a paste and serve as a dip with the eggplants.


In one of my previous experiments, I was running out of yogurt while making yogurt chicken. So I made a sauce using buttermilk instead. I was amazed at the interesting flavor that buttermilk brought to the dish. So in this dish, I added buttermilk to the filling. It's nice. I serve it with a cube of furu.
Sunday, May 2, 2010
Chinese chive egg pie
Vegetable pies are wonderful dishes, that can serve in all meals. My skill in making them has gradually improved with time. Here is one recipe that has rather nice composition.
Recipe 1: Chinese chieve pie (one 6"x6" pan)
Ingredients:
- 1 bunch (0.7lb) Chinese chives, finely chopped
- 1/2 cup (5) baby bella mushrooms, chopped
- 1/4 cup dried shrimps
- 1/2 cup celery leaves, finely chopped
- 1/3 cup flour
- 1/3 cup water
- 2 eggs
- 1/2 tp kosher salt
- dash of pepper


Recipe 1: Chinese chieve pie (one 6"x6" pan)
Ingredients:
- 1 bunch (0.7lb) Chinese chives, finely chopped
- 1/2 cup (5) baby bella mushrooms, chopped
- 1/4 cup dried shrimps
- 1/2 cup celery leaves, finely chopped
- 1/3 cup flour
- 1/3 cup water
- 2 eggs
- 1/2 tp kosher salt
- dash of pepper
- 1 TB oil
Procedure:
1. Heat 1 TB oil in a non-stick skillet. Add all the vegetables into the skillet and allow to cook until soft. Add the dried shrimps and cook for a little longer. Then pour all the vegetables from the skillet into a baking pan.
2. Mix flour with about equal amount of water until the flour fully dissolves. Beat in 2 eggs. Add salt and pepper. Mix well. Then pour into the pan and mix with the vegetables. The liquid mixture should come just right at the same level as the vegetable mixture.
3. Bake at 350F until done.

Recipe 2: Chinese chieve pie (one 6"x6" pan)
This time, I have more water in the flour mixture and bake it for a shorter time. When the pie cools down, the vegetables still become brown.
Ingredients:
- 2 bunch (1.2lb) Chinese chives, finely chopped
- 2 TB canned mushrooms, chopped
- 1/4 cup dried shrimps
- 1/2 cup flour
- 3/4 to 1 cup water
- 2 eggs
- 1/2 tp kosher salt
- 1 TB oil
Procedure:
1. Heat 1 TB oil in a non-stick skillet. Add all the chives and mushrooms into the skillet and allow to cook until they have shrunk, but not too soft. Add the dried shrimps and cook for a little longer. Then pour all the vegetables from the skillet into a baking pan.
2. Mix flour with water until the flour fully dissolves to form a paste. Beat in 2 eggs. Add salt. Mix well. Then pour into the pan and mix with the vegetables. The liquid mixture should come just right at the same level as the vegetable mixture.
3. Cover with foil. Bake at 350F for about 35 minutes until the top has risen. Turn heat off. Allow to sit in the oven for about 15 minutes. Remove from oven. Stick in a knife to test for doneness. Let cool at room temperature.


Saturday, May 1, 2010
Stuffed artichoke
I found a variation of artichoke that is stout and without sharp claws. It seems to be in season, and is on sale. So I bought two and started my experiment on them. I boil them for only a short time (about 4-5 minutes). Then I de-core them. They are rather easy to de-core. Moreover, the heart of the artichoke is rather big. So there is ample to eat! I love them. This time I tried a different stuffing from what I usually do. Instead of using raw meat, I use ham and paste of peas. It's good!

Recipe: Stuffed artichoke (for 2)
Ingredients:
- 2 large artichokes
Filling
- 2-3 oz ham, finely chopped
- 4 unsweetened water chestnuts, from can, finely chopped
- 3-4 TB paste of cooked chickpea
- 1/3 cup silken tofu, cubed
- dash of garlic powder
- dash of pepper
- salt (optional)
- pinch of marjoram flakes
- 1 tp cornstarch
- 1 TB glutinous rice flour
Procedure:
1. Boil the artichokes fully submerged in water for 4-5 minutes. Drain and allow to cool. Use a pair of scissors to trim off the top of the leaves in order to create an opening. Then use a spoon to dug into the bottom to remove the core.
2. Mix ham, water chestnuts, marjoram and chickpea paste together to form a mixture. Season with pepper, garlic and salt to taste. Add cornstarch and glutinous rice flour to adjust the thickness and stickiness of the mixture until it's really dry and solid. Mix in the tofu loosely. The water from the tofu will moisten the mixture. Stuff the artichokes.
3. Cover the opening of the artichokes and bake at 275F for 1 to 1.5 hours. Serve hot.


Subscribe to:
Comments (Atom)