Pages

Thursday, December 31, 2009

Ma lai go (1st attempt)

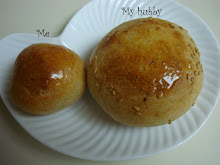
In Hong Kong style dim sum restaurants, there is a dessert called Ma Lai Go,  (马拉糕), literally meaning Malaysian cake, though I've never seen it in Malaysia or Singapore (perhaps ma lai go is related to "pandan cake"). Ma lai go is basically a type of steamed sponge cake and is not too sweet. Since I'd been investigating sponge cakes lately, I decided to check it out at wiki.

Recipe: Hong Kong ma lai go


Ingredients:
- 1/2 cup cake flour  (50g)
- 1/2 teaspoon (tp) baking powder
- 2 tp custard powder or vanilla pudding mix (10g)
- 1 egg
- 1.76 oz brown sugar (50g)
- 1 tablespoon (TB) butter (15g)
- 2 TB evaporated milk


Procedure:
1. Melt butter and set aside.
2. Sieve brown sugar to remove crumbs. Then beat with egg using electrical egg beater, until mixture foams and double to triple its volume. I use power switch 1 and it takes 30 minutes.
3. Mix flour, baking powder, custard powder or pudding mix thoroughly. Then fold in to egg mixture. Then add milk and butter.
4. Steam in bamboo steamer for 30-40 minutes.


I did some study on custard powder and found out that it's basically a mixture of cornstarch, sugar and flavoring. So I'm going to replace the custard powder with cornstarch next time.

Wednesday, December 30, 2009

My first roasted turkey!

Yeah! This winter I baked my first turkey ever! It's a 14.5 lb young bird, so big that I had to make sure there are friends willing to share the spoil before cooking it. Our home does not have the big equipments needed for handling turkey, so I tried to use foil to loosely cover it to prevent splitting. A friend told me that I may not need a drip pan for such a small turkey because the juice won't be plenty. So that saved me a lot of trouble. One trick I learnt from food.about.com, which seems to be very helpful, is to put some butter and seasonings underneath the turkey skin. The resultant turkey breast is really flavorful and tender. The cooking procedure is actually very simple, and clearly outlined on the turkey wrapper. This is what I did after studying the instructions.


Recipe: Roasted turkey with seasonings underneath skin


Ingredients:
- 1 whole young turkey, frozen
- 2-3 tablespoon (TB) softened unsalted butter
- 1/8 teaspoon (tp) salt
- 1 TB herb mix of thyme, marjoram, parsley, rosemary
- 2 TB onion powder
- 1 TB paprika powder 
- 2 TB rosemary grilling oil


Procedure:
1. Defrost in fridge for 3-5 day. After opening the wrapper of the turkey, remove gibbets and neck from the front opening and the back opening of the turkey. Then rinse the whole turkey, both inside and outside, with tap water. Trim off any large pieces of visible fat.
2. Mix salt and herb mix with softened butter. Use a knife to lift up the skin of the breast and the back of the turkey so that it can be thinly stuffed. Start from both the opening at the top and the bottom of the turkey, work through as much surface of the turkey as possible without tearing the skin. Then use a small plastic spatula to gently push in the butter with seasonings. Use fingers to rub on top of the skin to spread the butter thinly over the meat underneath the skin. Let sit in a baking tray.
3. Rub the top of the turkey skin gently with rosemary grilling oil, a little of the herb mix, and onion powder all over the turkey, including areas under the legs and wings. Then sprinkle paprika powder on top. 
4. Use foil to cover the the top and the side of the turkey loosely. Bake at 325F according to the following chart:

  • 8-12 lbs: 2 hrs 45 mins TO 3 hrs
  • 12-14 lbs: 3 hrs TO 3 hrs 45 mins
  • 14-18 lbs: 3 hrs 45 mins TO 4 hrs 15 mins
  • 18-20 lbs: 4 hrs 15 mins TO 4 hrs 30 mins
  • 20-24 lbs: 4 hrs 30 mins TO 5 hrs

5. Starting from one hour before the turkey is supposed to be done, check doneness of the turkey. It is done if leg joints can move freely when the drumsticks are rotated, or if clear juices flows out when inserting a fork into the deepest part of the leg joint. 
6. After taking the turkey out of the oven, let sit in room temperature for 30 minutes before carving.
7. Save turkey drippings in the pan for other use. Separate the fat from the juice before storage.

I probably should uncover the foil during the last hour of roasting to let the skin brown. I'll try that next time (which might be next year!)

Tuesday, December 29, 2009

Red Swiss chard roll

The leaves of the red Swiss chard are distinctively large and strong. It's comparable to savory cabbage in softness, and is highly foldable. So, it dawns on me that it could be a great wrapper material. Therefore, I decided to test it out one day. Considering the strong characteristic taste of the chard, I thought it'd match with something like beef. I would like to have a filling that somewhat cakes together when cooked. So I tried a beef, chili and eggplant filling.


Recipe 1: Red Swiss chard roll of beef chili (6-8 rolls of 2.5" long)


Ingredients:
- 2 oz lean minced beef
- 1 clove garlic, finely chopped
- 1 tablespoon (TB) leaves of celery chopped
- 1/4 cup Hormel chili
- 2 TB Dijon mustard
- 6-8 large leaves of red Swiss chard, stems removed
- 1/4 small Chinese eggplant, sliced
- 1 TB olive oil
- 3 TB mushrooms chopped
- 2 TB onions chopped
- 1/2 teaspoon (tp) basil flakes
- 2 TB oil to cook baking pan
- water


Procedure:
1. Cook Chinese eggplant, mushrooms, onions, basil flakes in 1 TB olive oil and 1/4 cup water until the mixture is very soft. Set aside and let cool. 
2. Brown beef. Add garlic and celery. Cook for a few minutes, then add Hormel chili and Dijon mustard. Mix warm. Turn off heat when mixture boils. Set aside.
3. Turn to the back of each red Swiss chard leaf, cut thin stripes on the red stem part perpendicularly to the flow of the vein. The cut should be about half the depth of the stem. Do not cut through the stem. Flip to the front of the leaf. Place 2TB beef mixture and 1 TB eggplant on the leaf at the stem end. Roll towards the leaf end, then fold both left and right sides to close the wrap. Use a wooden toothpick to secure the closure.
4. Set each wrap, with the toothpick side down, on a baking pan coated with oil. Cover pan with foil. Bake at 375F for 30 minutes. At this point, the leaf should have shrunk to the size of the filling, and the top side of the leaf should be dry while the bottom side soft. The oil helps prevent sticking. Very carefully detach the roll from pan and flip. Carefully remove toothpick. The wrap should stay intact without the toothpick. Then bake at 375F uncovered for 10 minutes, at which point the top will become crispy. Remove from oven and let cool in room temperature. Rolls will harden a little. Serve warm.


I really like vegetable rolls cooked this way. The wrapper is cooked, but crispy, while the filling cakes together. The taste of the chard matches well with the beef chili. A variation of the beef filling is to use chicken/turkey. The filling recipe is as follows.


Recipe 2: Red Swiss chard roll of turkey


Ingredients for turkey filling to replace the beef, celery and Hormel chili:
- 6 oz cooked turkey meat, cut into small pieces
- 2 TB mayonnaise
- 1 tp Italian Pesto paste
The remaining ingredients of the filling are the same:
- 1/4 small Chinese eggplant, sliced
- 1 TB olive oil
- 3 TB mushrooms chopped
- 2 TB onions chopped
- 1/2 teaspoon (tp) basil flakes
- 2 TB oil to cook baking pan
- water
Use 6-8 large leaves of red Swiss chard, stems removed


Procedure:

Cooking the eggplant as described in step 1 above. Then mix turkey meat, mayonnaise and pesto separately, without using any heat. Then make the roll as described in step 3, using the turkey mixture with eggplant instead of the beef. Both the beef and the turkey rolls take about the same time to cook.

Monday, December 28, 2009

Unsuccessful velveting chicken

We dined with some friends at a Chinese restaurant one night. I've always been puzzled by the tenderness their stir-fried beef and chicken. So I decided to go on the web to find out what they do to the meat. What I discovered is that they use two tricks: tenderizing with baking soda and velveting. Velveting is to coat the meat with a thin layer of egg white and cornstarch so as to preserve its tenderness during cooking. After the coating, the meat is then fried in a pot of hot oil for a short time without over cooking. Being so stingy with my use of oil, I just couldn't bear to use a pot of oil. So my velveting turned into pan-frying! But the idea of coating egg white and cornstarch on some tender chicken fillet was a nice one. Next time I might just cut the chicken into smaller pieces and see if it would work with a little oil. Since frying used so much oil, I decided to fry more than just chicken. Tofu is a very good second dish to make when one does not want to waste frying oil. 


Recipe: Fried chicken fillet (for 3)


Ingredients:
- 2 slices of chicken tender fillet
- 1 TB cornstarch
- white of 1 egg
- 1/4 cup oil
- dash of salt and pepper


Procedure:
Cut tender fillet into very thin slices about 1/8" thick. Marinate chicken in a mixture of cornstarch, beaten egg white, salt and pepper for 20 minutes. Heat oil to hot on a flat pan. Keep stove on med-high. Fry one side until white to very light yellow. When the edge is white, flip to the other side. Fry the other side mildly, take out and place on paper towel to absorb oil. Serve right away with chili sauce or BBQ sauce.


The reminding oil and egg white can be used to fry tofu the same way. Use 1/3 pack of soft tofu. Cut tofu into 1.5" squares of 1/2" thick. Drain of water for 5-10 minutes. Dip into the remaining egg white and cornstarch mixture. Then fry in hot oil on low heat. Turn once when bottom side is golden. Serve with non-fat based sauce, such as hoisin sauce.


A vegetable side dish that goes very well with fried chicken is a simple sliced cucumber in vietnamese chili sauce.


Sunday, December 27, 2009

Homemade soup made perfect

Homemade soup is at its pinnacle when there is a wide collection of diverse but compatible ingredients to serve on a rich stock. In fact, most of the time, a great soup is made of leftover ingredients, carefully combined in appropriate proportions. Here is a soup that plays with the combination of pork shoulder, seafood, tofu, cabbages, noodle and a few spices. It yields incredibly yummy result. This soup tastes so good that my husband suggests that I jot down my own recipe!


Recipe: Homemade soup (for 2)


Ingredients:
Main ingredients
- 2 cups of thick stock of pork shoulder bone, skimmed of fat
- 1/2 pack of soft tofu, cut to 1/2" thick pieces
- 5 large leaves of kappa cabbage, chopped to 2" big pieces
Ingredients for enriching flavor, aroma and texture
- 1/2 small purple onion, chopped to 1" pieces
- 1 large leaf of purple cabbage, cut to 1/4" slices
- 1-2 oz polska sausage, cut to 1/8" slices
- 3-4 fish balls
- 2-3 oz cooked shoulder cut pork, cut to 1/2" pieces (meat from the stock)
- 1 teaspoon (tp) small dried shrimps
- 2 tablespoon (TB) dried (not cooked) small anchovies
- 2 TB rice noodle, use the broken pieces
- 8 hua jiao pepper corns
- 2 TB Sriracha hot chili sauce
- 1 TB sesame oil


Procedure:
1. Use a 3-quart pot with lid. Boil purple onion, purple cabbage, polska sausage, fish balls, cooked pork, dried shrimps, anchovies and rice noodle in 2 cup of stock. Let it boil on med-high heat for 10-15 minutes.
2. Add the white parts of the kappa cabbage into pot and cover lid. Let cook for 5-10 minutes. The cabbage will cook partly in the liquid and partly in the steam. Stir occasionally to make sure every pieces of cabbage has a chance to be soaked in the hot liquid. When the kappa cabbage softens, it gives out water. So no additional water is needed to make the soup. After all the white parts of the kappa cabbage is soft, add Sriracha hot chili sauce and the green parts and cover for 5 minutes. Stir occasional to let all the leaves cook. When all the kappa leaves are cooked, transfer all solid ingredients out of the pot to a serving bowl. 
3. Use the remaining liquid to cook the tofu with hua jiao pepper corn for 5 minutes. Then transfer everything from the pot to the serving bowl. Sprinkle sesame oil on top and serve.

Saturday, December 26, 2009

Using chipotle oil and wasabi peas in a salad

By sheer chance, I found a chipotle bread dip made of canola oil, soybean oil, balsamic vinegar, extra virgin olive oil, chili essence, dried rosemary, paprika essence, and chipotle essence. As a blended condiment, it's clear and dark. Its composition of flavor is rich, first with a distinctive chipotle aroma and spiciness, then the noticeable but not to stringent acidity of vinegars, and finally a thick and subtle aroma of herbs and spices.  Since I don't eat much bread, I have been using it as marinate, salad oil, cooking oil, whatever else I could think of. I find it particularly interesting with salads. One day, I tried it out with a snack of wasabi-coated green peas. The wasabi flavor and the crunch of the peas added a new dimension of excitement to the celery salad. By the way, I liked to eat the leaves of the celery because of its flavor.


Recipe: Salad with chopotle oil and wasabi peas (for 2)

Ingredients: 
- leaves and the yellow stems of one stalk of celery, carefully washed and chopped
- 2 large leaves of purple cabbage, chopped
- 1/4 cup wasabi coated green peas snack
- 3 tablespoons (TB) cashew pieces
- 2 TB chipotle bread dip

Procedure:
Toss the chopped vegetables in 3 TB of well-shaken chipotle bread dip. Since the bread dip is a thick oil, only a small amount of it is needed. When the vegetables are well coated with the dip, mix in the peas and the cashews. Serve right away, else the crispy coat of the peas will be lost.


Friday, December 25, 2009

Christmas special: Beef braised in red wine


God rest ye merry, gentlemen
Let nothing you dismay
Remember, Christ, our Saviour
Was born on Christmas day
To save us all from Satan's power
When we were gone astray
O tidings of comfort and joy,
Comfort and joy
O tidings of comfort and joy


This Christmas, we stayed local, somewhat locked in because of the recent snow and freezing rain. Early morning we received a warm greeting from a long-time friend, and faithful sister, that reminded us of the rest we have in Christ. Refreshed by the Lord's grace, I joyfully walked into the kitchen to prepare for a nice dinner in celebration of this day.


The braised red wine beef is one of the dishes that my husband recommends me to cook whenever we have American friends. He says they'd like it. They surely do. To cook this dish well, there are actually two important points to pay attention to. First, to pick the right type of beef cut, and second, to control the braising time and heat. Braising is good with tough cuts. But it's really important to pick cuts with a little fat and connective tissues marbled among the muscles. Very lean chunks of muscle do not do well with braising, because braising is effective only to soften the connective tissues, not the muscles. With braising, it's the fatty juice from the softened connective tissues that makes the muscle smooth. With braising, the meat should be in very little liquid and cooked at such a low temperature that the liquid produces tiny bubbles only once in a while (like every 20 seconds). The braising liquid makes a savory gravy with the flavor of the meat, the wine and the vegetables. No other seasoning is needed.

Recipe: Beef braised in red wine

Ingredients:
- 4 slices of beef round cut with coarse marbling, cut perpendicularly across muscles to 1" thick
- 1-2 cup red wine
- 1 large carrot, pealed and chopped to 1" cube
- 1/4 lb long beans, washed and cut to 3" long

Procedure:
1. Cut beef slices to about 2"x3" big pieces of 1" thick. Place in a baking pan. Broil in oven on top shelf at 450F. After broiling one side, drain meat juice from baking pan, and save for braising. Flip and broil the other side. Beef should toughen after broiling.
2. When both sides are broiled, place beef with all its juice in a flat-bottom shallow pot that is just big enough to contain all the beef. Pour red wine to cover the beef. Put on stove top at low to med-low until liquid starts to bubble. Heat pot on lowest temperature possible that keeps the liquid bubbling very mildly every 5-10 seconds. Let cook for 2 to 4 hours, until beef starts to soften, that is, it bends when lifted. Turn heat off and let sit on stove until serving time.
3. Drain 3/4 of the braising liquid into a small pot. Boil carrot and long beans in the liquid on med-high to high heat for 5-8 minutes. Take the vegetables out of the liquid immediately and keep with the beef. If there is more than 1/2 cup of braising liquid, boil it down to 1/2 cup. Keep the braising liquid separately. 
4. Just before serving, heat up the pan of beef on medium heat, and boil the braising liquid in a separate pot on high heat. Pour the braising liquid onto the beef and vegetables as a gravy. Serve right away.

Thursday, December 24, 2009

Petite creme and red bean gelatin

When it comes to candies and desserts, I like the mildly sweet ones, not those overloaded with so much sugar that you can't taste any other tastes in the food. In order to fully savor the pleasure of a sweet, I like to serve it along with a cup of light tea or some bitter drinks that help heighten the flavor of the sweet. One fine day, I just had an insatiable craving for sweets. So I decided to make my own gelatin of creme and red bean paste using a mini-muffin mold. Each hole in the mold is about 1/8 cup by volume. I made 6 little cups. I used butter to coat the mold because its texture and flavor go really well with the creamy taste of the milk. A variation is to use the combination of rum cream and dark coffee; or evaporated milk and bailey+cocoa. Fun!

Recipe: Creme and red bean gelatin (make six gelatins of 1/8-cup size)

Ingredients:
- 5 tablespoon (TB) red bean paste 
- 2 teaspoons (tp) sugar (to taste)
- dash of salt
- 4 fl oz evaporated milk
- 2 tp gelatin powder

Procedure:
1. Thinly coat 6 holes of a min-muffin baking pan with unsalted butter. 
2. Mix 1 tp of gelatin powder with 2 TB cold water. Heat to melt gelatin powder. Then blend in 3 TB evaporated milk. Pour into the mold to fill the 6 buttered holes by one-third full. 
3. Mix red bean paste with sugar and a dash of salt. Note the sweetness of food tends to be dampened when chilled, so if the paste tastes just sweet enough at this point, then add a little more sugar to make sure it tastes sweet after chilling. Let the mold sit in fridge for 1/2 hour or until gelatin is set. 
4. Mix 1 tp of gelatin powder with 2 TB of cold water. Heat to melt, then blend in the 5 TB of sweetened red bean paste. Mix thoroughly and let it cool to room temperature. Then pour into the mold, on top of the milk layer. Note that though the volume used in recipe adds up to 12 TB, water may evaporate during heating. So the cups may not be filled to top. Let chill for 1 hour or until set. 
5. When serving, use a sharp plastic bendable toothpick to loosen the gelatin from the side and bottom of the mold. Invert the mold to let the gelatin fall out.


I actually prepared the red bean paste from scratch. The Chinese make their red bean paste by prolonged boiling of the bean (down to complete dissolution in the liquid), then by filtering with a cloth. But I like to eat the skin of the red bean because it has fiber. So here is what I do.


Procedure of making red bean paste:
1. Soak 1/2 cup of red beans in 1.5 cup water for 3 days. Replace water each day. Beans will double in volume after soaking.
2. Boil red beans in 2 cups of water. In the first hour use med-high heat. Then use med-low heat for another 1-2 hours. Add water to keep the beans covered by liquid. The beans are ready when they flake easily with a fork. At this point, the liquid should also be red and a little thick. The ratio of liquid to bean is about 1:1. 
3. Take out beans and save the liquid. Use a mortar and pestle or fork to ground the beans into a coarse mixture of flakes and bean skins. Then add back the liquid to form a coarse paste that slides thickly when scooped up by a spoon. Use a blender to blend the mixture into a smooth paste. Let sit for 20-30 minutes. The mixture should remain uniform in texture. If the mixture starts to separate into water and bean, then it's too thin, remove the liquid on top. 
4. For storage, heat the mixture on med-low heat until it boils, stirring often to prevent sticking. Then save in jar to chill, or tupperware to freeze.

The plain red bean paste always gives me a hint of coffee taste when it first enters the mouth. Perhaps it's just the illusion of my own senses.

Wednesday, December 23, 2009

Green Thai eggplant salad duo

The dainty shape of the green and round Thai eggplant and its crispy refreshing taste leads me to imagine turning it into a mini salad bowl of some sort. So I decided to try out two ideas of fillings: a tuna mayonnaise, and a chicken satay. The good thing about this eggplant is that it is easy to de-core, and it gives a sturdy bowl of very thin wall (1/8" think) and a large cavity. So each eggplant can hold quite a bit of fillings.


Recipe: Green Thai eggplant salad appetizer (make 4)


Ingredients:

- 4 medium round green Thai eggplants, pick the fresh and sturdy ones

For tuna mayonnaise filling:
- 2 tablespoon (TB) mayonnaise

- 3 TB tuna flakes
- a few drops lemon or lime juice
- 2-3 cranberries, cut to small pieces
- 2 teaspoon (tp) finely chopped purple and white onions
- 1 tp finely chopped celery
- dash of pepper


For satay chicken filling:
- 1 TB satay sauce
- 2 tp sesame oil
- 3 TB chopped cooked chicken meat
- 2 tp coarsely ground cashew pieces
- 1 tp chopped purple and white onions
- 2 tp chopped green onions


Procedure:
Cut each eggplant at about 4/5 of its height from the bottom. Use a corer to remove seed pod and leave a shell of about 1/8" thick. It takes some patience. If desired, save the seeds to be mixed with the salad filling. Mix the ingredients of each salad separately, and stuff the eggplants.


The tuna mayonnaise salad has a good mix of fresh vegetable and fruit taste, which blends in smoothly with the crispy, unassuming texture of the eggplant. The satay salad has quite a bit of a crunch and a spicy sweetness unique to the Southeast Asian cuisines. These two salads go very well with the Thai eggplant, and make a wonderful duo appetizer. 

Tuesday, December 22, 2009

A curry of beans and beef

It was a friend's interest in beans that prompted me to try cooking beans from scratch again. My first attempts with mixed beans had been such bad failures that the package left over from those days was over one year old. What I learnt from those failures is that, with mixed beans, it's possible to have some beans overcooked while others still undone. So this time, I decided to soak the beans for 3 days instead of just 1. And it worked out amazingly in a curry. I cooked up this recipe myself to see how cheese would fare in a curry. Malaysians cook this curry with coconut milk, and use it in a meat dish. The coconut milk serves to smoothen the curry and makes it less spicy.


Recipe: A curry of beans and beef (for 2)


Ingredients:
- 1 cup of soaked mixed beans 
- 2 oz lean beef, cut into thin strips
- 1 carrot coarsely chopped
- 1/2 stalk celery chopped
- 1 tablespoon Penang curry paste
- 1 tablespoon ricotta cheese (or coconut milk)


Procedure:

Boil beans in 3 cups of water for 1.5 hours. While boiling, keep enough liquid to cover the beans, and not more. When the beans are done, add chopped carrot and celery. Boil for 15 minutes. Add curry paste and mix well. Use some liquid from the stew to mix with ricotta cheese to form a paste in a small bowl. Turn heat to low. Add beef pieces one at a time into stew. Stir and make sure the beef is immersed fully in the stew. Let cook for 1 minute. Add the paste of ricotta. Add dash of salt if desired.


Since this is a bean dish and is not a too spicy, it can be eaten as a meal by itself. It is particularly appetizing in cold days. My food critic gave me a broad smile after one sip.

Monday, December 21, 2009

Homemade unsweetened apple chips

Towards the end of autumn, the market was flooded with so many apples at such a bargain price that I just couldn't resist getting a bunch. Needless to say, my new project became finding 1001 ways to consume and preserve these apples. Given what common equipment we have at home, one idea that came to mind was to make some apple chips. 


Recipe: Homemade unsweetened apple chips (a snack for 2)


Ingredients:
- 1 medium apple
- 2 tablespoon of lemon juice


Procedure:
Wash the apple, peel off skin and remove core. Cut to very thin slices slightly less than 1/8" thick. Place the apple slices in a bowl and coat all sides with lemon juice for 3 minutes. (The lemon juice helps keep the color of the apple, but adds lemon taste to the fruit. If the color of the apple isn't totally important, the lemon juice can be skipped.) Place the slices on stainless steel grid that fits into the toaster oven. Do not use aluminum or other metal grids because the acid from the fruit reacts with the metal. Place in the toaster oven and let heat at 200F for about 30-40 minutes or until the surfaces of the pieces are mostly dry. Toaster oven's temperatures vary, so judge readiness based on the texture of the apple instead of minutes. Loosen pieces from grid and flip. Continue to heat for another 30 minutes or until the pieces become very dry. The inside of the slices may still be a little moist. Turn off heat and let sit in oven until the slices become totally crispy (about 4-6 hours). Reheat oven for a few seconds every now and then, if necessary. Loosen the slices occasionally to prevent sticking to the grid. Thinner slices tend to become crispy faster. Take them out of oven first and let cool in a dry place. Towards the end, the thicker slices in the oven may still be moist inside and they need further heating. Watch out that the half-dried apple slices brown very quickly. Try to avoid browning as much as possible. Serve chips when cooled. Allow to cool completely (about 40 minutes out of oven) before storing. Do not store any apple slices that are still moist/soft inside. Pack in air-tight containers and store in cool places. 


Sunday, December 20, 2009

Cabbage and kelp wraps

This week, I have been doing a lot of grocery shopping, picking up things like preserves, sauces, and seasonings, along with meats and veggies. The fridge is filled with goodies. Today, of all days, I have a day by myself. So I decided to cook out something new for my husband, to thank him for his love to me.


Recipe: veggie wrap (3 cabbage wraps and 2 kelp wraps)


Ingredients:
- 3 large leaves of kappa cabbage
- 1 slice of kelp, about 12"x6"
- 5 oz chicken tender (98% fat free), about 2 pieces
- 1 small carrot, very finely sliced to strips
- 1/3 cup rice noodle
- 2 tablespoons (TB) dried dark mushrooms
- 1/4 teaspoon (tp) sugar
- dash of salt
- 1 TB oil
- 2 tp oil (for marinating chicken)
- 2 tp sesame oil (for marinating chicken)
- 1/4 tp cornstarch (for marinating chicken)


For sauce:
- 1 tp hoisin sauce
- 2 tp light soy sauce
- 1/2 tp penang curry paste
- 1 TP water


Procedure:

  1. Soak rice noodle in water for 10 minutes. Then cook in boiling water for 3 minutes. Drain and set aside.
  2. Soak dried mushrooms in water for 15 minutes. Then cook in boiling water for 2-3 minutes. Drain and set aside.
  3. Cut chicken tender into long strips. Mix well with sugar, salt, sesame oil, oil and cornstarch to marinate for 15 minutes. Heat frying pan on medium to med-high heat. spread chicken evenly on pan and let fry on both sides until each side is white. Then add carrot and let fry until chicken is lightly yellow. Side aside.
  4. Soak kelp in water for 30 minutes to remove salt. Cut out a few 12" long thin strips. Then cut remaining to 5 2.5"x4" rectangular sheets.
  5. For each kappa cabbage leaf, trim off the thick white stem, and save the green part. If there are some thick white veins on the green part of the leaf, then cut a few strips on the white, perpendicularly to the flow of the vein. Boil a pan of water. Dip one leaf in hot water for 20 seconds or until it has mildly softened. Shake of water. Spread on a large plate. Put one sheet of kelp on the trimmed side of the cabbage leaf. Add small bunch of chicken, carrot, noodle and mushroom on the kelp. Fold two sides, and roll towards the green end of the cabbage leaf. If the leaf has been properly softened, then it still looks raw, but has softened. When the leaf is fully folded up, use a strip of kelp to tie up the wrap.
  6. For each sheet of kelp, add small bunch of chicken, carrot, noodle and mushroom. Tie up with a strip of kelp, then stuff some chicken on top for decoration.
  7. Turn oven to 250F. Put kelp wraps and cabbage wraps in a tray. Let heat in oven for 20 minutes or until top is dry. Then take out. The baking cooks the cabbage without turning it soggy.

To prepare the sauce: mix hoisin sauce, soy sauce and penang curry paste with 1 TB water on low heat. (Or set it in oven in a sauce dish along with wraps for 20 minutes). Spread sauce on veggie wrap and serve.


Friday, December 18, 2009

Simply eggplant in kimchi

There are days that simplicity is all that we wanted at home. In such days, I'd cook out a meal that is quick and easy, but not boring. One does not have to trade off enjoyment for simplicity.


Recipe: Eggplant in kimchi (for 1-2)


Ingredients:
- 1 small chinese eggplant
- 1 clove of garlic minced
- 2-3 tablespoon Korean kimchi
- 1 stalk spring onion, thinly sliced
- a few drop of sesame oil


Procedure:
Cut eggplant into 2" pieces, boil with kimchi and garlic in water enough to cover half the eggplant. Stir occasionally. After eggplant has softened, serve on dish. Sprinkle green onion and sesame oil on top. The spring onion is important. It adds a sparkle of crispy freshness to an otherwise dully spicy dish.


Thursday, December 17, 2009

Leafy greens egg roll

It's fun to cook egg rolls. The most fun part is to fold the egg from a sheet to a roll and keep the toppings wrapped up. I succeed only half the times. The comfort is that an poorly folded egg roll tastes just the same! Still, I keep practicing the folding whenever I cook egg rolls. I've found that egg rolls with tender green leafy vegetables need to go with a stronger seasoning. It's because the green leaves tend to be watery, and thus dilute the taste of the egg. So with leafy greens, I season my egg roll with a Vietnamese fish sauce that is mixed with chili and vinegar.


Recipe: Leafy greens egg roll (for 3-4)


Ingredients:
- 3 stalks baby kappa cabbage, very finely chopped to 2 cups
- 3 eggs
- 2 teaspoons dried shrimps
- 2 tablespoons (TB) oil
- 1 TB Vietnamese fish sauce


Procedure:
Squeeze water out of chopped kappa cabbage. Beat eggs and mix with chopped cabbage. Mix very well to soften leaves. Heat oil in flat pan. Pour mixture into pan and let cook undisturbed on med to med-high heat. When bottom side is cooked and detached from bottom, fold left and right sides to form a roll. Flip. Let surface cook to golden yellow. Sprinkle fish sauce. Serve hot.


Wednesday, December 16, 2009

Golden soft tofu slices

There are many types of tofu and many ways of eating it. I like soft tofu best because of its tenderness. It tastes best when cooked as thin pieces, maximizing the surface area that enables the tofu to integrate with the seasoning. However, soft tofu tends to break easily. One very fine way to overcome this is to lightly fry the tofu slices in oil before using them. Frying hardens the surface of the tofu and seals its moisture and tenderness within. The hardening of the surface enables thin slices of soft tofu to hold its shape and moisture better while cooking with other ingredients. Here is a dish I tried out one day with this technique. The tofu was nicely caramelized with the taste of chili on the outside, while its inside remained juicy and tender.


Recipe: Tofu chili with pork and purple onion (for 2)


Ingredients:
- 1/2 pack of soft tofu, cut to 1"x2"x0.25" pieces and drained
- 4 oz lean pork, cut to small thin strips
- 2 tablespoon (TB) oil
- 1 TB sesame oil
- 2 teaspoon (tp)light soy sauce
- 1/4 tp salt
- dash of sugar
- dash of pepper
- 1/2 tp cornstarch
- 1/3 cup thick non-spicy vegeterian chili with beans
- 1/3 small purple onion, thinly sliced


Procedure:
Marinate pork in oil, sesame oil, soy sauce, salt, pepper and sugar for 5 minutes. Add cornstarch and mix thoroughly. Let sit for 5 minutes. Sautee in pan on med-high to high heat until light brown. Take out pork, but save the juice and oil in pan. Spread tofu pieces in pan on top of oil. Let fry for 5-10 minutes on medium heat. Move occasionally to minimize sticking. When bottom is golden and lightly hardened, flip to fry the other side. When both sides are fried, add purple onion and fry for 5 minutes. Then add non-spicy chili and sauteed pork. Mix well without breaking the tofu pieces, and allow sauce to thicken. Let the surface of tofu be caramelized with the chili. Gently flip tofu once to coat the other side with chili sauce. Serve hot.


Tuesday, December 15, 2009

Chinese pork and vegetable bun

One bright winter afternoon, I stumbled upon an interesting blog, by a lady called Kiki. She created plenty of recipes on fine food. The pictures looked so good, I decided to translate some of the recipes and try them out. One of the interesting recipes I found was her meat-and-vegetable bun (bao zi), which my husband had very fond memories of when a friend of ours treated us to their dinner at home. So I went all the way to buy a bamboo steamer, and a pot specially for steaming (that was so hard to find, I finally stumbled on it at a thrift store!) With just one try, I became fully convinced that those fashionable stainless steel steamer pots are just no substitute to the time-tested bamboo steamer. The bamboo steamer allows good circulation of heat without trapping the moisture, making it perfect for steaming fine food, such as Cantonese dim sum. No wonder it's not gone out of fashion! This is what I got at my first attempt with my new toy.


Recipe: Chinese steamed pork and kappa cabbage bun (make 6 buns of 2"-2.5" diameter)


Ingredients:


For the bun
- 1 cup all purpose flour (125 g)
- 2 tablespoon (TB) white sugar (25g)
- 1 teaspoon (tp) baking powder
- 1 tp instant yeast
- 1/4 tp sugar, for activating the yeast
- 3/4 cup water


For the filling
- 6 oz minced pork
- 2 leaves of kappa cabbage, finely chopped and drained of water
- 2 TB dried mushroom, soaked and chopped, then drained
- 1/2 tp salt
- 1/4 tp sugar
- 2 tp cooking rice wine
- 1 TB sesame oil
- 1 tp fresh ginger finely chopped
- 1 TB oil


Procedure:
1. Fry kappa cabbage and mushroom in 1 TB oil to bring out the aroma and dry out the water. Let cool. Then mix thoroughly with minced pork, cooking rice wine, sesame oil, ginger, salt and sugar. Stir in one direction for a while until the mixture becomes elastic. Set aside.
2. Mix flour, baking powder and sugar thoroughly in a bowl. Heat 1/4 cup of water to 40 degree celcius. Add yeast and 1/4 tp of sugar to the warmed water, and let sit for 30 seconds. Then add water with yeast into the bowl of flour mixture. Mix to form a dough. Slowly add in another 1/2 cup of water. Then knead just until dough is very soft, smooth and elastic but not sticky to hand. Do not over-knead. Because baking powder is used, work immediately to form the buns once the dough is ready. Partition into 6 pieces of equal size. Roll out each piece into a round palm-sized sheet about 1/4" thick. The dough from this recipe is rather elastic, so it can be stretched quite a bit without breaking. Add about 2TB filling to the center of the sheet, and close it up on top to form a bun about 1.5" diameter.
3. Let sit for about 20-30 minutes in a warm place to let the dough rise. Dough will grow by 1/4" diameter. Then steam on high heat for 30 minutes. When done, they expand to about 2"-2.5" by diameter with a slightly translucent skin.


Monday, December 14, 2009

Veal chop to go with red Swiss chard

The first time I saw the red Swiss chard, I thought it were rhubarb. In fact, till now, I can't distinguish between the two apart from tasting them. But I suppose knowing the difference is important since the red swiss chard is edible both leaf and stem, while the rhubarb's leaves have toxin. The leaves of the red Swiss chard actually tastes not bad when raw, though it certainly tastes better with some cooking. People recommend sauteing it leaves and stems in garlic and olive oil. It's not bad eaten that way, but I prefer adding in some meat juice to give it a richer taste of fullness. So one evening, I decided to cook it along with veal chop.


Recipe: Veal chop and red Swiss chard


Ingredients:
- 1/2 lb veal chop, 1/4" thin per piece, wiped dry
- 2-3 tablespoon (TB) Worcestershire sauce 
- 1 clove garlic, finely chopped
- 2 cups chopped red Swiss chard, stems and leaves separated
- salt and pepper to taste
- 1-2 TB oil


Procedure:
Coat a flat frying pan with a little oil. Place veal chop on pan and let sizzle on medium heat until brown, flip and fry the other side. Sprinkle Worcestershire sauce on chop and let sizzle until the sauce caramelizes on the bottom side of the chop. Flip and let sauce coat the other side. When done, take out chop. If the oil and meat juice has almost dried out on the hot pan, add 1 TB oil prevent drying. Add chopped garlic and let sizzle for 10 seconds. Add red Swiss chard stems and stir. The water from the stems will deglaze the pan and add the flavor to the vegetable. When the pan is deglazed, add the leaves and season with salt and pepper. Let saute on med-high to high heat until leaves start to soften and shrink a little. Serve right away with veal chop.


Sunday, December 13, 2009

Thai eggplant fritters

When I heard that the round little green Thai eggplant could be eaten raw, the first thing I did was to give it a bite. Chump! Indeed, it's like none other eggplants that I've eaten. It's so crispy, fresh and even a little juicy! I toyed with one of the eggplants and discovered how easy it was to dig out the seed pod. The hard shell that remained could make a great container for filling or sauce. It's really fun. I heard that the Thai people don't eat the seeds, but I liked the crunchy feel of them. With a little thought, I decided to try giving the eggplant a light coat of spices and match it with a dip of some Southeast Asian condiments. 


Recipe: Crispy Thai little eggplant


Ingredients:
- 3 Thai eggplants, sliced to 6-8 pieces each
- cumin powder
- dried basil flakes
- paprika powder
- 4 tablespoon (TB) flour for coating
- 1 egg
- 2 TB oil


Dip ingredients:
- 1 teaspoon (tp) Sriracha hot chili sauce
- 1/2 tp fish sauce
- 1/4 tp vinegar
- 1/4 tp or less of sugar


Procedure:
Mix cumin, basil, paprika with flour and set in a plate. Beat an egg. Dip eggplant slices into egg, then roll in flour to coat thinly. Heat oil in a flat pan on medium heat. Lightly fry all the flat sides of the eggplant slices. Once all sides are golden, take out the eggplant. Cooking longer will cause the eggplant to soften. For the dip, mix all ingredients and serve.